Tuesday, June 18, 2013

Wet N' Wild Polishes

Wet N' Wild Polishes
Wet N' Wild, The Nail Zone Collection, Eden. This is a wonderful mint green polish. It goes on smooth the consistency is thin, it's opaque. One of my friends liked it so much she went out to buy one, but couldn't find it. All the ones we looked at were a brighter one and more blue than green.

My Explorations

So recently the Zellers in the mall in my city became a Target, so I thought lets go see what nail polishes they have. This is what I found...

PROS

  • Good prices
  • lots of products
CONS
  • Half the product wasn't there (lots of empty shelves :P )
  • Polishes are everywhere (mixed in with matching make-up brands), I would prefer if all the polishes were grouped together for easier looking
  • not as much colour variety within some of the brands as Shoppers Drug Mart, but at the same time there were differing ones (I guess this goes half in pro and half in con...)
But $3 Sally Hansen polishes will win over me haha. But I will always go back to Shoppers for their clearance table :)

Monday, June 17, 2013

Hard Candy Polishes

This blue has no name. I really like this one it had an almost holographic look with it's sparkles.

This green looked a lot nicer in the bottle. The gold and silver glitters mixed with the green just don't appeal to me (so I only wear it on my toes). Sorry it looks like crap in this picture I was trying something new. If you want easy polish removal you coat your nails in white glue and let it dry then paint on top of that. So I was trying that plus the polish has gotten quite thick.

Such a beautiful purple. It might be one of my favorites in my collection. It had such a fine sparkle in it that it created an almost holographic look to it.

Saturday, June 08, 2013

Pokeball Nails ^__^

So I saw this on a friend's nails and I really wanted to do them since I am going through a very large pokemon phase right now. So pokeball nails...

Start with a white after your base coat.

Using a dotting tool, tape, striping polish and/or a small paint brush colour the top half of your nail red 

Once that is dry using a striping brush or a small paint brush draw a black stripe on the red and white border. The easiest way to make the line straight and uniform is to hold the brush still as you roll your finger

After in the center add a largeish black dot can use a dotting tool, or whatever you like (dotting tool, straight pin on an eraser, tooth pick, bobby pin, pencil...)

once dry add a smaller white dot

And you are done! :)


Icing Polishes

Polishes by Icing

This is Chic Chic Horray from Icing. I find it really smooth. It doesn't streak and it's white white. Works very well for any designs of mine


Thursday, June 06, 2013

Quo by Orly Polishes

Quo by Orly polishes


Quo by Orly Bubble Bath
Quo by Orly, Bubble Bath. This one was a little nicer than just plain sparkle polish because it had the faintest pink in the base so softens it from just seeing your nail itself. (the purple tint is from the polish I was wearing before :P)

Cover Girl Polishes

My polishes by Cover Girl
Cover Girl Always Nude
This is Cover Girl  Always Naked. From their Outlast Stay Brilliant collection. I bought this because I figured it's nice to have a nude one, the problem is, it isn't quiet the colour I had in mind but it was on sale so I didn't have the choice of being picky. I really like the square bottle, it's different and easier to store then a whole bunch of circular bottles.

Cover Girl Starry Blue
 This is Cover Girl Starry Blue (#240) from their NailSlicks collection. This one is a different colour, its more of an indigo then a pure purple or blue. It's very thin though

Revlon Street Wear Collection

So this is one of their old collections. I'm pretty sure you can't buy these in stores anymore but I'm sure you could find some on ebay or something.
Revlon Gun Metal Chrome
 This is Revlon from the Street Wear Collection. The colour is Gun Metal Chrome. I really like this colour and I wear it often, it's a shiny grey, almost silver. The polish is thin and easy to apply. The brush is thin and the long which means you lose a bit of the control. When applied the polish streaks a little but it's barely noticeable.
Revlon Elf Lutin
This is Revlon from the Street Wear Collection. The colour is Elf Lutin. This is a very deep green with a nice shine from it. The consistency and brush is similar to the Gun Metal Chrome.

Revlon Chroma Chameleon

Revlon Tanzanite

This is from Revlon's Chrome Collection. Tanzanite. Its a beautiful purple that shifts between green blue and purple. I love chromes and this one is a definite favorite! This picture only shows the purple so I will have to put it on again and get some different angled shots. 

Water Marbling

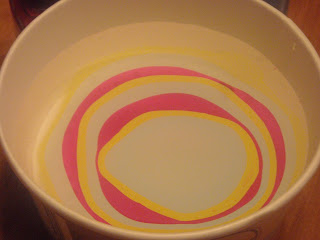
So like everywhere on youtube there is water marbling I just had to try it. I tried 2 different times.

This is my second try

 So what you are supposed to do is start with a base coat.
 What I have seen is the colours turn out better if you use a white first


 Next is to wrap the finger in tape to lessen the mess


 These are the colours I used


The trick is to do it as fast as possible and if that isn't working as well then make sure you get some slow drying polishes to help. 
 So use as many drops as you want in each ring of colour as well as use as many colours as you want. 
 taking a toothpick, orange stick, sharp pencil or anything else with a point. Drag it through the polish without touching the very outer edge. Create whatever design you want, strips, flowers, anything.
 When you have the desired pattern dip the taped nail into the part you want.

 While leaving the finger in. Let the polish dry a bit (like 30 seconds) and clean it up with a toothpick, q-tip etc. If you try to take out the finger before cleaning up the polish then they stuff on the water could ruin your design.

 Take off the tape
 Repeat on each nail

This is my first try


 So the first nail I did worked out not too bad except there was a bubble on it... :P

 My second nail not too bad either but it went all smudgy.


 I tried 3 nails at once, but I let it dry too long on the water and I put it in with my fingers too close so the polish was all tacky and stuck in clumps to the tape and my fingers :P

Good luck

Storage and Organization

So everyone is curious about how others store their polishes. I love the ideas of turning CD racks into stands and the wall stands for easy display and access. But I don't have the space in my room for that :( So I started by storing them in increasingly larger shoe boxes but eventually moved them all into a large drawer

I then thought that I should get some nail wheels so I always know what I have. But searching the interweb demonstrated to me that the best was to make swatchicles because they as easier storage (take less room), can hold more information and since they are all separate it is easier to see how colours look with each other. So I went and made swatchicles and found out I had more polish then I thought haha (up to 80 polishes now, with a few put aside for birthday gifts...oops :) )

So swatchicles (if you haven't looked anywhere else) are very easy to make. The hardest part is making the nail stick to the popsicle stick. So I tried hot glue, it worked a bit as long as no pressure was applied to the nails. I then tried wood glue which worked a little better. What I finally did was pop the nail off leave the glob of wood glue on and then use nail glue to adhere the nail to the wood glue. This worked best I found.

So what you need is
-Glue (your choice, wood glue, nail glue and/or hot glue)
-popsicle sticks
-fake nails
-black pen
 So what others say is to only use the largest size of nails, but when I buy a box of 200 nails I don't want to waste then so I use the smallest nails for testers when I make polish colours.

So first is to glue the nail to the stick. If you want when using the smaller nails it works best to cut the stick into a thinner point at the top.

When all is dry paint the nails. Do as many coats as you like. So I read that you should use a top coat to avoid fading. I can't confirm this since I didn't try without top coats.

 So let them dry overnight before moving them to avoid scratches and dents.

 Put as much information on the stick as you want. I put
-Polish Brand
-Colour Name
-Polish Collection
-Colour Number
I have seen others also put on
-Number of coats
and much more information
I found that a Sharpie bled where more like gel pen like doesn't bleed and is smaller so more information fits
 Once all done i stored them in a group in a paper cup but then for my birthday my brother got me a hand cream set in this cute cardboard carry case. So I added some dividers and it holds them perfectly.
I have them divided into 8
-Pinks
-Browns and Reds
-Yellows and Oranges
-Greens
-Blues
-Purples
-Glitters
-Blacks, Whites, Greys