Monday, December 09, 2013

Christmas Tree Nail Art

So I decided to do some simple but pretty christmas trees. 

To start use a gold or nude like base colour
(I used Revlon's Gold Coin)

To make the trees I used tape to make triangles but you could also use a paint brush. 
Make sure to apply the tape when the base is completely dry.

Then paint the triangles green. 
(I used Icing's Electric Emerald)

 Remove the tape when the green is still wet.

Now time to add some lights to your tree. Grab a glitter or sparkly polish and paint it on the tree.

Now time for the star on the tree. If you have a small decal or gem you can use that or you can just use a small paint dot at the top of the triangle.


Now you're done don't forget to finish with a top coat to protect your design.

Have fun :)

Sunday, December 01, 2013

DIY Hand Scrub

So this Christmas I found what I should get for all the girls in my life. I saw a make your own hand scrub video on youtube by cutepolish http://www.youtube.com/watch?v=6phnnzno8m4. It inspired me to make some.


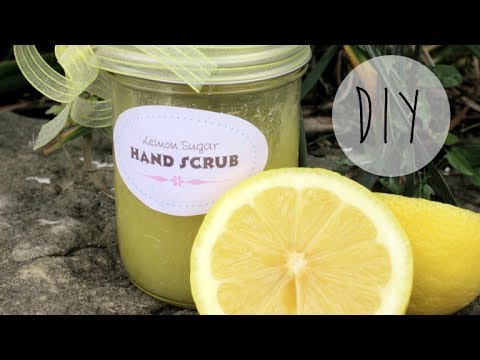
So I tried what she made (sugar [exfoliant], olive oil [moisturizer], lemon juice [skin brightener]) but it smelt like greek salad dressing...lol if you don't mind the smell it works well (ie. good for your feet :) ). So I did some research and found coconut oil works. So I bought some essential oils (rosewood bergamont, orange, lavender), coconut oil and some 3/4 cup jars from a local Fields.

Mixing that with sugar worked really well, but I started to notice my hands were a bit dry after using it. So after some more research I found that coconut oil dries the skin a bit... *sigh* and I thought I was done.

So back to the internet...I found that vitamin E oil works as a moisturizer. Vitamin E oil is so weird (and expensive). Its really thick, goopy and a bit sticky. My theory is that it forms a layer on our skin and just traps all the moister from escaping.

So I added this oil to the mixture and after trying it I found that it worked well.

So I decided to go farther and just make it a mini hand spa present :) I had quite a few polishes I had bought that I either didn't like, or I had bought as a present. So I added a polish (for each specific person) and then I went to the Bath and Body Works in my mall and got each one a mini hand lotion.

Muse: Rosewood, Bergamont
Lavender
Orange

So I bought 3 different scents. Each one smelt amazing, personally the orange is the best scent


So depending on which of the 3 scents I used I used a different colour (so I knew which was which)


So then I needed something to scoop it out with. I had a natural hand scrub I had bought from a naturists store and it had this little wooden spoon. I flirted briefly with the idea of getting my dad to help me cut some small bricks of wood and then helping me get started chiseling out the shape.

Luckily my mom is smarter than me and suggested I buy some little serving spoons from Value Village, I went in and found some souvenir spoons instead which I prefer. Since I could try and personalize it to whoever was getting it, like for my grandmother I gave her the spoon with a tiny needlework flower done on the handle and for my best friend one from Ireland since she and one of her friends is sorta trying to plan to go.

So I made 9 separate same yet at the same time individualized mini hand spas
-Best friend 1
-Best friend 2
-Girl Guide Secret Santa
-Work Secret Santa
-Mom
-Honorary Aunt 1
-Grandmother
-Friend
-Honorary Aunt 2

I am very pleased with how this worked out. One told me that their "old lady looking hands are starting to look healthy". That made my day :)

Now if only all my presents could be this awesome...

Lol I really wanted to add some coloring to make it look fun but I didn't want to risk dying peoples hands...

Wednesday, November 13, 2013

Bloglovin

<a href="http://www.bloglovin.com/blog/11829179/?claim=apw9u5353e9">Follow my blog with Bloglovin</a>

Sunday, July 07, 2013

Some Thoughts

How to save money if you love doing nail art, and where to find.
        Instead of buying the bottles of polish with thin brushes, invest in a tiny tiny paint brush. If you go to your local art store (I fond mine at Opus) and look you will find tiny paint brushes. I got mine for like $6, it looks like it has all of 5 hairs, yet at the same time it almost looks too big. But I find it works amazingly well and it saves me from buying specialty polishes just for the brush which can cause me to have multiple bottles of the same colour. I did find that buying silver striping bottle worked well since it had a longer brush and the small paint brush I have is too small to hold a good amount of glitter.
         If you are looking for a dotting tool and want to buy one, and not just use tooth picks and bobby pins, then you don't need to look far. If you haven't noticed, and you may not if you don't have a scrapbooking friend, scrapbookers use the same tool, but they call it an embosser. So visit your local craft, or better yet scrapbooking, store you should be able to find one. I haven't looked at prices since I use my mom's embosser, but I keep meaning to visit her scrapbooking store.
Other handy tools include

  • make up sponges (for ombre)
  • straws (create a cool effect)
  • toothpicks (small dots and can work in a pinch in replacement of the paint brush)

Tuesday, June 18, 2013

Wet N' Wild Polishes

Wet N' Wild Polishes
Wet N' Wild, The Nail Zone Collection, Eden. This is a wonderful mint green polish. It goes on smooth the consistency is thin, it's opaque. One of my friends liked it so much she went out to buy one, but couldn't find it. All the ones we looked at were a brighter one and more blue than green.

My Explorations

So recently the Zellers in the mall in my city became a Target, so I thought lets go see what nail polishes they have. This is what I found...

PROS

  • Good prices
  • lots of products
CONS
  • Half the product wasn't there (lots of empty shelves :P )
  • Polishes are everywhere (mixed in with matching make-up brands), I would prefer if all the polishes were grouped together for easier looking
  • not as much colour variety within some of the brands as Shoppers Drug Mart, but at the same time there were differing ones (I guess this goes half in pro and half in con...)
But $3 Sally Hansen polishes will win over me haha. But I will always go back to Shoppers for their clearance table :)

Monday, June 17, 2013

Hard Candy Polishes

This blue has no name. I really like this one it had an almost holographic look with it's sparkles.

This green looked a lot nicer in the bottle. The gold and silver glitters mixed with the green just don't appeal to me (so I only wear it on my toes). Sorry it looks like crap in this picture I was trying something new. If you want easy polish removal you coat your nails in white glue and let it dry then paint on top of that. So I was trying that plus the polish has gotten quite thick.

Such a beautiful purple. It might be one of my favorites in my collection. It had such a fine sparkle in it that it created an almost holographic look to it.

Saturday, June 08, 2013

Pokeball Nails ^__^

So I saw this on a friend's nails and I really wanted to do them since I am going through a very large pokemon phase right now. So pokeball nails...

Start with a white after your base coat.

Using a dotting tool, tape, striping polish and/or a small paint brush colour the top half of your nail red 

Once that is dry using a striping brush or a small paint brush draw a black stripe on the red and white border. The easiest way to make the line straight and uniform is to hold the brush still as you roll your finger

After in the center add a largeish black dot can use a dotting tool, or whatever you like (dotting tool, straight pin on an eraser, tooth pick, bobby pin, pencil...)

once dry add a smaller white dot

And you are done! :)


Icing Polishes

Polishes by Icing

This is Chic Chic Horray from Icing. I find it really smooth. It doesn't streak and it's white white. Works very well for any designs of mine


Thursday, June 06, 2013

Quo by Orly Polishes

Quo by Orly polishes


Quo by Orly Bubble Bath
Quo by Orly, Bubble Bath. This one was a little nicer than just plain sparkle polish because it had the faintest pink in the base so softens it from just seeing your nail itself. (the purple tint is from the polish I was wearing before :P)

Cover Girl Polishes

My polishes by Cover Girl
Cover Girl Always Nude
This is Cover Girl  Always Naked. From their Outlast Stay Brilliant collection. I bought this because I figured it's nice to have a nude one, the problem is, it isn't quiet the colour I had in mind but it was on sale so I didn't have the choice of being picky. I really like the square bottle, it's different and easier to store then a whole bunch of circular bottles.

Cover Girl Starry Blue
 This is Cover Girl Starry Blue (#240) from their NailSlicks collection. This one is a different colour, its more of an indigo then a pure purple or blue. It's very thin though

Revlon Street Wear Collection

So this is one of their old collections. I'm pretty sure you can't buy these in stores anymore but I'm sure you could find some on ebay or something.
Revlon Gun Metal Chrome
 This is Revlon from the Street Wear Collection. The colour is Gun Metal Chrome. I really like this colour and I wear it often, it's a shiny grey, almost silver. The polish is thin and easy to apply. The brush is thin and the long which means you lose a bit of the control. When applied the polish streaks a little but it's barely noticeable.
Revlon Elf Lutin
This is Revlon from the Street Wear Collection. The colour is Elf Lutin. This is a very deep green with a nice shine from it. The consistency and brush is similar to the Gun Metal Chrome.

Revlon Chroma Chameleon

Revlon Tanzanite

This is from Revlon's Chrome Collection. Tanzanite. Its a beautiful purple that shifts between green blue and purple. I love chromes and this one is a definite favorite! This picture only shows the purple so I will have to put it on again and get some different angled shots. 

Water Marbling

So like everywhere on youtube there is water marbling I just had to try it. I tried 2 different times.

This is my second try

 So what you are supposed to do is start with a base coat.
 What I have seen is the colours turn out better if you use a white first


 Next is to wrap the finger in tape to lessen the mess


 These are the colours I used


The trick is to do it as fast as possible and if that isn't working as well then make sure you get some slow drying polishes to help. 
 So use as many drops as you want in each ring of colour as well as use as many colours as you want. 
 taking a toothpick, orange stick, sharp pencil or anything else with a point. Drag it through the polish without touching the very outer edge. Create whatever design you want, strips, flowers, anything.
 When you have the desired pattern dip the taped nail into the part you want.

 While leaving the finger in. Let the polish dry a bit (like 30 seconds) and clean it up with a toothpick, q-tip etc. If you try to take out the finger before cleaning up the polish then they stuff on the water could ruin your design.

 Take off the tape
 Repeat on each nail

This is my first try


 So the first nail I did worked out not too bad except there was a bubble on it... :P

 My second nail not too bad either but it went all smudgy.


 I tried 3 nails at once, but I let it dry too long on the water and I put it in with my fingers too close so the polish was all tacky and stuck in clumps to the tape and my fingers :P

Good luck