Tuesday, February 25, 2014

Striping Tape Design

I recently bought some coloured tapes and I wanted to try them out.
I had a set of 10 different colours and I already had green nails so unless I wanted my nails to look Christmasy, white was the best option for me to try. 


It's pretty easy to see what I did but here it goes
-2 verticle strips along one side then, 
-2 horizontal strip across the tip of the nail.
This was my first time using tape so I am still learning. I have learnt that I need smaller thinner scissors than just kitchen scissors. I couldn't always get very close. I gave up trying to use scissors on the tiny ends and used nail clippers but I ran the risk of cutting part of my nail.
I also used a top coat to help the tape stick on.

Of course if you didn't feel like making sure the tape fit correctly you can always paint a white coat on the bottom than once dry place your tape on pressing to the edges. Then paint a green on top taking off the tape in the reverse order you put them on.

As you can see I redid the design on a nail wheel. I kept reading how the nails are too close on the wheels so I taped the sides beside the one I was doing.

New Organization

So I know I have already done an organization post but I have since changed how I organize my polishes.
The drawer I was using is a clothing drawer so it was quite wide and the base is only particle board. All my polishes were getting to weigh quite a bit and I could see the base bending this caused me to start worrying about the stability of it.

I remembered watching a youtube video by sayanythingbr00ke on her organization  http://www.youtube.com/watch?v=ZOmm6q6I1DI, and at one point she used a little 3-drawer unit to store her polishes in. So I looked up what she used and I was lucky enough to find that Michaels sells them along with many other styles with their Recollections collection (oh btw. if you are looking for nail art or storage stuff scrap-booking stuff works great). http://canada.michaels.com/Storage/products-scrapbooking-storage,default,sc.html?prefn1=brand&prefv1=Recollections

So this collection sells cubes and drawers and what not in similar sizes so you can stack them together and make your own little storage system. Most of these are about 14" cubes.

I chose the one with 3 drawers since I did  the math and each drawer would be tall enough to hold the tall polish bottles but short enough to not waste space. So this sells in Canada in Michaels for about $50 :P but I went to the states on a shopping trip and found it for $40 and there was a 50% off sale (new years sale) so I was lucky and got it for about $20 american.

This size is also perfect since it can sit in my closet underneath my clothes. 

 So I made the bottom drawer all my colour polishes. I used those little circle stickers that are used to keep paper holes strong as a colour branding on top of the polish bottles.
I paint the circle with a coat or two and stick it to the top of the bottle (if the name of the polish isn't on the top), this idea came from Julep who does similar I think. This makes is much easier to see what one I am wanting when they are all crammed into one drawer.
I used the bottom drawer since it stills weighs quite a bit and I didn't want to risk the particle board breaking. The bottom drawer has less than 1cm of clearance so even with bending it will rest on the floor

 My Second drawer is clear coats, base coats, top coats, empties, presents and nail art supplies

 My third drawer is my LED gel polish stuff and a few nail art stuff.

My Dad had a large amount of maple wood (I love maple wood, I made a giant book case from maple in high school one year) so he made me a little carry case for when I do my nails in other rooms (easy transportation). He had me draw the diagram with sizes which was helpful. So I made 7 spots, one for remover, one for a little container to hold used nail cleaning products (I didn't want to risk ruining the vanish and wood with acetone), 2 small spots for nail art and q-tips and what-not, 1 for cotton balls and bigger items and then 2 spots for polishes. 

Monday, February 24, 2014

Ardene Polishes

My Ardene Polishes. 
I have  a few of these since I always used to go there for polishes since the price was pretty good (and I hadn't really discovered the amazingness of Shoppers Drug Mart and their clearance table haha). One problem I have is that their brushes are really thin and round

 Ardene Ballet Shoes. I like this soft pink. The coats are a little streaky at first but a 3rd coat fixes it all.

Ardene Red Sapphire. It's a nice red but it's really thin. Shown is 4 coats. I need to find a nice deep red that doesn't need 50 million coats

Sunday, February 23, 2014

IT SNOWED!

So I realize this has nothing to do with nails but I'm excited :)


We only get like one good snowfall of the season in December in the Lower Mainland. But we got some in February!! :) Its so awesome! I'm so tempted to call in sick at work so I can enjoy the snow (which would be sitting beside a window and stare at it). But that doesn't give me money... :( Well at least I get to work near a window today...and I get to see all the people coming in covered in snow.

But here is some snow nail art I did for my mom in December

I started with OPI's Keeping Suzi at Bay as the base then I sponged some of Sally Hansen's Hi Ho Silver onto the tips. Then with my white nail pen I drew a snowflake and added some smaller snowflakes (the dots) onto her ring finger.

Saturday, February 22, 2014

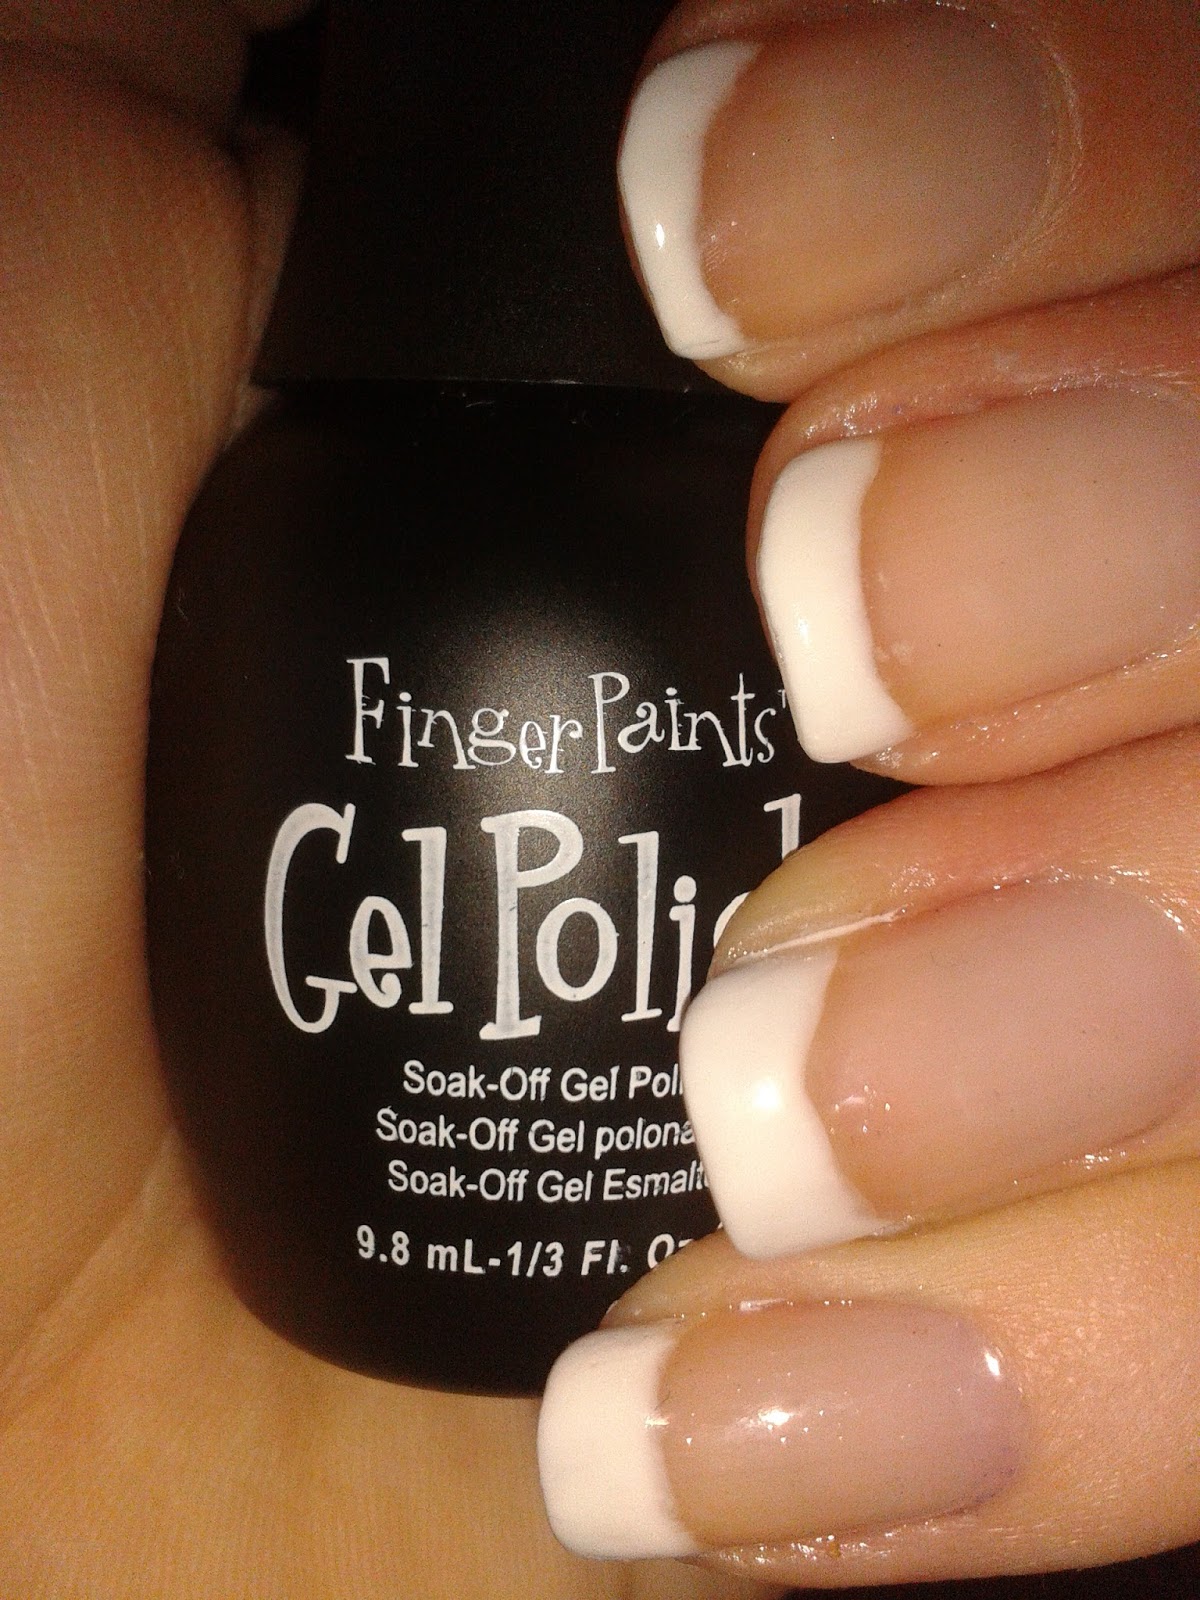
French Mani

So I've been looking for a white gel polish so I can do a french manicure that will last. Until I found a Sally Beauty store in my town I could only find Quo by Orly gel polishes which didn't have white (which seems weird to me). I now have some, Yay! :)

I love the look of a frnech manicure, it always looks so polished. I was wanting to do it with gels to make it last longer. The gels also gave them a beautiful shine! They looked so profestional.

Friday, February 21, 2014

Nailuv kit

This Christmas I got a LED soak-off Gel kit (brand is nailuv). It took some fiddling but now that I can apply it properly it comes out looking superb. I find it does have a longer lasting power but if you are someone with their hands constantly in water than it doesn't last the 2 weeks. You might get a few days if you are lucky if you are a swimmer or a dishwasher or someone that has to for work (or whatnot) wash their hands a lot. I love the look of gel nails they look so sleek.

So this kit came with a buffer, a nail stick, an instruction leaflet,
a lamp,

a bottle of remover (acetone), a bottle of cleaner (rubbing alcohol),
a bottle of bonder (15mL),


a bottle of base/top coat (15mL)


and 5 polish colours (7mL; 0.24oz).


All-in-all a great kit, the sucky thing is at retail price it is more than $100 unless you can find it at Costco or some cheap warehouse like place.

So I am really getting into the gel polish, except for the prices of the stupid polishes.

Quo by Orly sells some 4.4mL (0.15 oz) bottles for about $10!


At Sally Beauty they had about 10mL (1/3 oz) bottles for about $15 which is getting more reasonable


and nailuv sells 15mL (0.5 oz) bottles for $10-15 which seems pretty good (if you don't include shipping). I know OPI has some gel polishes and I want to try those but I have to find them first... :P

Since we cure gel polishes under an LED or UV lamp (oh btw. all gel polishes can be cured with UV but not all can be cured with LED so make sure you buy ones that work with your type of lamp) sunlight can thicken the polish. This is why they are kept in opaque bottles (mainly black), to prevent sunlight from thickening and potentially ruining your beautiful, expensive polish.

Beauty Store

Yay! I found a beauty store in my area that sells lots of nail art supplies.

So I was looking online where to find some nail polish thinner since it was recommended that I don't use actual paint thinner. And someone on a forum was like I get mine at Sally Beauty, so I looked online and found one like right beside my mall and I was amazed that I had never spotted it before since I often drive past it to leave the mall.

Sally Beauty might be my new favorite store :)

There are lots of things for nail art like striping tape and rhinestones. There was also some polish brands I had been looking for but couldn't find, like Orly and China Glaze. There were also some gel polishes which is nice since so far I had only been able to find the little tiny Quo bottles, but Sally Beauty had 2 or 3 different brands that were actually normal sized bottles. :)

Price wise nothing too different (than I could tell) than other stores, though I did find their OPI polishes about $1.00 more but I think there is some sort of loyalty card that can make the prices drop a dollar or two.

Needles to say I got myself some polish thinner (I laughed since Orly and OPI both had a bottle the same size and with the exact same 2 ingredients and OPI's was more expensive), a white gel polish, striping tape and Seche Vite (which I had also been looking for)

I am now debating about paying $5 and getting a membership card. If I get the card they will give me a $5 coupon to be used within the month. As well as if I spend $35 in a month they give me a %15 off coupon. And If I don't save $5 worth my $5 membership for next year will be free.

I will probably only go there if I need nail art supplies, gel polishes, China Glaze or Orly. This is because the Shoppers near my house has a clearance rack where they often have $2 nail polishes which saves me on cost and limits how much I buy since I try to buy from only that rack (plus grabbing extras from there makes good presents)

Thursday, February 20, 2014

Pink Floyd

I grew up listening to Pink Floyd, being that they are my Dad's favorite band. So I made this one just for him.

I was unhappy with the colours I chose. I thought that they would be good but when I did it the rainbow didn't work with itself :( If I did it again I would have to go colour shopping and play with the colours before I did my nails. Overall I am very pleased with how it turned out. It also got great reception :) I am (sadly) not ambidextrous so I didn't dare try doing it on my right hand instead I wrote Dark Side of the Moon on my nails using a nail art pen :)

Now I need to do Another Brick in the Wall nails

Wednesday, February 19, 2014

Sephora

Sephora

This is Sephora's beautiful Get Revenge. It's an amazing pinkish red, beautiful shine and opaque.
My mom went to France last summer as a leader with a youth retreat.
After the retreat in Taizé they went to Paris for a few days. Of course the girls dragged the leaders into the largest Sephora in the world. Of course all she gets for herself and me is 3 small bottles of beautiful polish and 2 nail files...Haha. But of course Sephora can be costly.

Home-made Polishes

The polishes I have made myself 
This was just pure glitter I tried. I went to Michaels and picked up a whole bunch of glitter (I went through a glitter faze). What I did was put on a base coat. Take your chosen glitter and pour it onto the nail. If spots were missed then use a clear coat in the spots and repeat. Then seal it all with a top coat to you wont leave a trail of glitter. I found this to stay on for ages. I wore it at work (which probably wasn't good since I may have left glitter in food...) but I didn't find any chipping for days, I was amazed. Tips are to get a higher quality glitter that wont bleed onto your top coat. 


This is made form the Essence brand eye shadow. The name is Happy Hour. To make this I bought suspension base, ball bearings and empty bottles. I mixed about 1/2 suspension base and 1/2 clear polish. I added 2 ball bearings and then added as much eye shadow as I wanted. The eye shadow should be finely chopped up so not to become clumpy. As well as use a paper funnel or it will get messy quick. For next time I make some though I think I will do the whole thing suspension base since I find that the pigment does settle quite thickly at the bottom of the bottle. So unless you choose a dark pigment the polish will come out very sheer. This is a good way to use up old eye shadows that you don't use anymore.