Wednesday, February 19, 2014

Maybelline Polishes

My Maybelline Polishes. Their Colour Show collection has some beautiful colours
Maybelline Color Show Polka Dots, Pretty In Polka #85. This is from their new (and I may have seen limited time?) Polka Dot Collection. The bottle said to me buy me I am awesome and pink ;)  hehe I really like this one. It's sort of like glitter polish but instead of glitter, it has black and white hexagonal spots. What I have is 3 coats on but I think I may want 4 coats for a more opaque look. It creates an awesome looks and its instant design. The spots were just as much of a pain in the butt to remove as actual glitter in polish though. 

Maybelline Color Show Twilight Rays #240. So I was a bit disappointed when I got this, the bottle made it look really sparkly and stuff but wen I put it on it didn't have that same wow :( I got a better design by using black polish with lots of glitter over top (see the below picture)
Ardene's Tuxedo with Tivoli's glitter polish on top
Because of that I put it in my presents stash, and one of my best friends chose it for her birthday this year 

Maybelline Color Show Brocades Collection, Amethyst Couture. This one looked so amazing in the bottle I bought a blue and white/silver one as well but when I put it on I didn't like it nearly as much :( The bottle made it look very glittery and maybe even holographic. But it had some really chunky glitters that made it into almost a textured. Needles to say I was disappointed, into the present pile they go :)

Essie Polishes

My Essie Polishes (they have the most beautiful pastels)

 This is one of Essie's Magnetic polishes. It's called Crocadilly. I really like this colour and I was really interested in trying a magnetic polish. As my first try I found that since the magnet is flat and a nail is rounded I had to do it as 2 or 3 parts. It works by (and the directions on the label say) that to paint one thin coat on all the nails. Then to paint a think coat on a nail and right away holding the magnet over it as close as possible. So what I found was the top part of my nail would change but then I would go to do the sides and it would be too dry so I would have to add more paint. It was a pain in the butt but I made it work and it looks really cool when done :) The green had a shine and it didn't streak.


Essie Shake Your $$ Maker. This is a beautiful green but it needs quite a few layers and it turns out matte. I don't like matte because I enjoy the look of shiny nails. But Mattes do have uses in nail art.

Essie Meet Me At Sunset. A dark orange/red. It has good coverage (not sheer), it doesn't streak and has a shine.

Ombre

So my friend and I bought 2 Ombre sets by LA Girl 

One was Girls Night Out, A bright summer one
the other was Spring Fling, A blue one with glitter


Personally I like the Girls Night Out better since its brighter, the blue one is too...I don't know boring? But who knows maybe it looks better wearing it than on swatchicles. Anyways luckily my friend was the one who bought it not me :) So the kits came with a top coat as well. Girls Night Out came out as matte.

Gosh

Gosh


This is Gosh's Ocean. It does look like ocean water. It has the perfect mix of blues and teals, with a brilliant shine. Every time I paint my cousin's nails she chooses this one :)

China Glaze

China Glaze

So where I live it's easier to find OPI than China Glaze so I have very few of these.

This beautiful, bright fushia is called Beach Cruise-r
This one I got at Christmas from my brother and when I asked him where he got it so I would know the store he said his girl friends he was shopping with shoved him into a store...SO I am still on the hunt.
When I went to use this one is was incredibly think, I'm not sure if he grabbed a bad one or if it's this colour or if it's China Glaze in general... :(

But I have now gotten some thinner and I am happy to say that it is now workable, And I know know where to find China Glaze

Avon Polishes

Avon

This is Flamingo by Avon. It's another soft pink color. It looks good under a black crackle.

Sally Hansen Polishes

Sally Hansen Polishes

I do and I don't like Sally Hansen. They have some really nice colours and a few of the collections are nice but I am usually more likely to buy another brand.

Sally Hansen's Complete Salon Manicure Collection Hi Ho Silver. It would look fabulous with a gown for a fancy evening :)


Sally Hansen's Hard as Nails Xtreme Wear Collection. Perfect Pear-ing. This one caught my eyes on the shelf. It's so vibrant. And I have to say I like this Sally Hansen collection, it's cheap and durable.

Sunday, February 02, 2014

Super Bowl


So I'm not a football person...But my dad is a little bit so just for him I made some Seahawks nails :)

For the eagle thing I made it using some refillable nail art pens.
The thumb is Suzi Says Feng Shui.
The pointer and pinky fingers are Queen Victoria Street
The ring finger is Cotton Candy with Quo by Orly Baby Yellow Instant artist
The middle finger is Suzi Loves Cowboys with Chic Chic Horray 

So this one got a really good reception :)
I love the simplicity of it. I don't usually do mix-matched art I usually prefer the look of one solid pattern, but this one worked really well. I tried to get my family to draw the eagle on my right thumb but they all laughed at me :( So I did it myself probably better than they could have done. 

Monday, December 09, 2013

Christmas Tree Nail Art

So I decided to do some simple but pretty christmas trees. 

To start use a gold or nude like base colour
(I used Revlon's Gold Coin)

To make the trees I used tape to make triangles but you could also use a paint brush. 
Make sure to apply the tape when the base is completely dry.

Then paint the triangles green. 
(I used Icing's Electric Emerald)

 Remove the tape when the green is still wet.

Now time to add some lights to your tree. Grab a glitter or sparkly polish and paint it on the tree.

Now time for the star on the tree. If you have a small decal or gem you can use that or you can just use a small paint dot at the top of the triangle.


Now you're done don't forget to finish with a top coat to protect your design.

Have fun :)

Sunday, December 01, 2013

DIY Hand Scrub

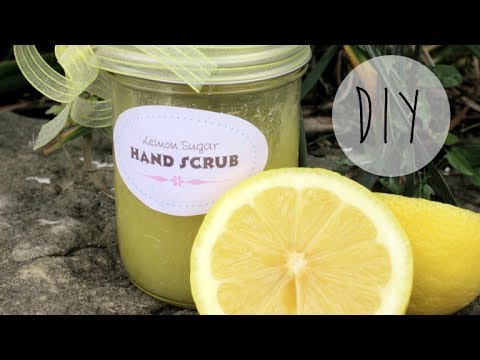
So this Christmas I found what I should get for all the girls in my life. I saw a make your own hand scrub video on youtube by cutepolish http://www.youtube.com/watch?v=6phnnzno8m4. It inspired me to make some.


So I tried what she made (sugar [exfoliant], olive oil [moisturizer], lemon juice [skin brightener]) but it smelt like greek salad dressing...lol if you don't mind the smell it works well (ie. good for your feet :) ). So I did some research and found coconut oil works. So I bought some essential oils (rosewood bergamont, orange, lavender), coconut oil and some 3/4 cup jars from a local Fields.

Mixing that with sugar worked really well, but I started to notice my hands were a bit dry after using it. So after some more research I found that coconut oil dries the skin a bit... *sigh* and I thought I was done.

So back to the internet...I found that vitamin E oil works as a moisturizer. Vitamin E oil is so weird (and expensive). Its really thick, goopy and a bit sticky. My theory is that it forms a layer on our skin and just traps all the moister from escaping.

So I added this oil to the mixture and after trying it I found that it worked well.

So I decided to go farther and just make it a mini hand spa present :) I had quite a few polishes I had bought that I either didn't like, or I had bought as a present. So I added a polish (for each specific person) and then I went to the Bath and Body Works in my mall and got each one a mini hand lotion.

Muse: Rosewood, Bergamont
Lavender
Orange

So I bought 3 different scents. Each one smelt amazing, personally the orange is the best scent


So depending on which of the 3 scents I used I used a different colour (so I knew which was which)


So then I needed something to scoop it out with. I had a natural hand scrub I had bought from a naturists store and it had this little wooden spoon. I flirted briefly with the idea of getting my dad to help me cut some small bricks of wood and then helping me get started chiseling out the shape.

Luckily my mom is smarter than me and suggested I buy some little serving spoons from Value Village, I went in and found some souvenir spoons instead which I prefer. Since I could try and personalize it to whoever was getting it, like for my grandmother I gave her the spoon with a tiny needlework flower done on the handle and for my best friend one from Ireland since she and one of her friends is sorta trying to plan to go.

So I made 9 separate same yet at the same time individualized mini hand spas
-Best friend 1
-Best friend 2
-Girl Guide Secret Santa
-Work Secret Santa
-Mom
-Honorary Aunt 1
-Grandmother
-Friend
-Honorary Aunt 2

I am very pleased with how this worked out. One told me that their "old lady looking hands are starting to look healthy". That made my day :)

Now if only all my presents could be this awesome...

Lol I really wanted to add some coloring to make it look fun but I didn't want to risk dying peoples hands...